Manage Users
Introduction
Collexo's Manage User page lets you easily manage all users who have access to the platform. You can add new users, activate or deactivate existing users, edit details, delete users, and view profiles as needed. Collexo’s User management is based on RBAC (Role-Based Access Control) that allows administrators to define user roles and assign permissions based on responsibilities, ensuring secure and controlled access to platform features.
How to Navigate?
There are 2 ways in which you can navigate to the Manage User page
- Account Settings -> User and Permission -> Users
- Menu -> Admin Setting -> Manage User
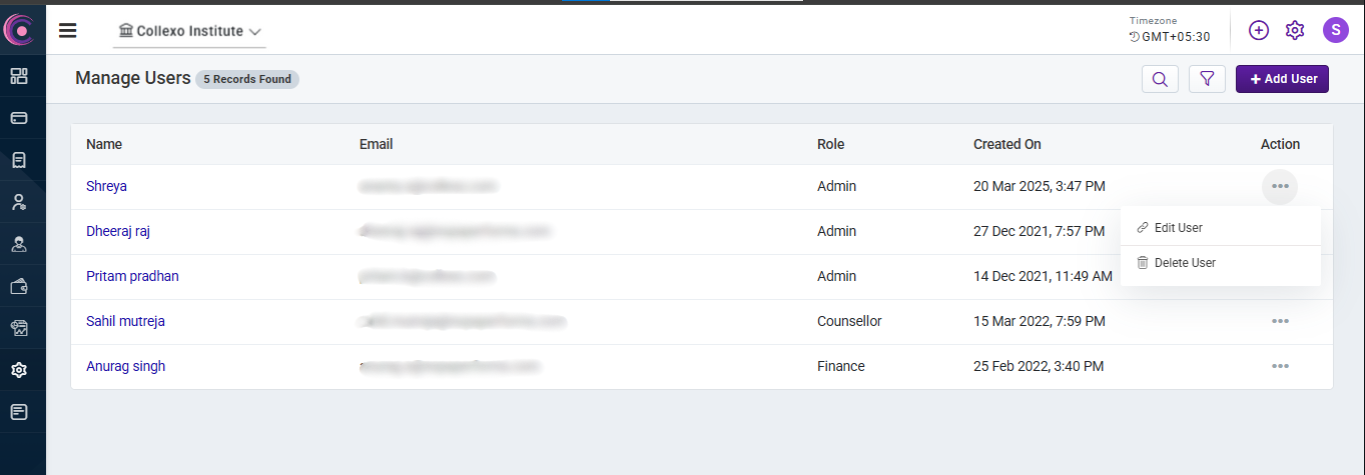
Accessing the Manage user page
Once you navigate to the “Manage User” page, you'll get a centralized view of all your institute’s users that have access to Collexo’s Institute Portal.
Users with the appropriate permissions can edit and update user roles to ensure platform access remains restricted to the right individuals.
How to add a New User?
There are 2 ways in which you can add a new user :
- If you are on the “Manage User” page, you can add a new user by clicking on the “Add User” button.
- Alternatively, if you're in the “User & Permission” section under the “Account Settings” page, you can directly select “Add User” from there.
Upon clicking on the button, a pop-up will appear where you’ll need to fill in the following details to complete the process:
- Role: Select the appropriate role from the dropdown menu. To learn more about each available role, refer to this article.
- Email: Enter the email address of the user to be added. The user will receive an invite link to activate their account. (Note: The invitation link is valid only for 24 hrs) User has to setup their account before the link expires.
How can the User Activate their Account ?
Once the user receives the invite, they can activate their account by clicking on the link and signing up on Collexo’s Institute Portal. They would have limited access to the Institute Portal based on their role.
User Roles can also be modified or updated later if needed, allowing for flexible access management.
Conclusion
By leveraging both default and custom roles, Collexo ensures that every team member has the right level of access and control. This structured approach enhances security, simplifies operations, and aligns platform access with institutional responsibilities.
Related Articles
Manage Bank Account
Introduction Managing finances efficiently is crucial for educational institutions, especially when dealing with getting funds in multiple accounts. Collexo makes it easy to organize these payments by allowing you to add multiple bank accounts and ...Manage Payment Gateway
Introduction A payment gateway (PG) serves as a bridge connecting your institute’s bank account to the platform. This facilitates the transfer of funds after a student/applicant completes a transaction on the platform through various online modes ...Institute User Roles
Introduction Collexo allows you to manage your institute’s platform access efficiently by assigning roles to users based on their responsibilities. These roles help you control who can view or perform specific actions within the platform. To support ...Custom Roles
Overview You have the option to set up custom roles, giving you full control over user access and platform interaction. How to create a Custom Role? As a prerequisite, you need to have the appropriate permissions to access and add Roles. To create a ...Creating Your Business Account on Collexo
Introduction Account creation is necessary to enable your institute to make use of Collexo's platform. To create a new account, navigate to the Business Accounts page found within the Manage Account menu. How to Navigate? Navigate to the Menu. Access ...